Machine embroidery: making Eyeglass case
You can purchase Eyeglass Case Spider 0001 digital embroidery design in our shop.
Making a spectacle-case using embroidery machine is not as difficult as it may seem at first glance. We hope that this master-class will be useful for you.
Supplies needed (photo 1):

- A piece of fabric suitable for quilting for the outer. You can use satin or crepe satin.
- A water soluble nonwoven and a stabilizer. For instance, Freudenberg’s Vilene Soluvlies / Solufleece
- Padding polyester
- A piece of fabric for the inside, for instance fleece as we want the inside to be nicely lined to protect the surface of eyeglasses.
- Thick tear-away stabilizer.
- Machine embroidery threads
- Sharp needles for embroidery. Note: if you use metallic machine embroidery threads it’s better to use special needles.
- Temporary adhesive spray.(It is not necessary, but it will make your work easier). Before start working test your temporary adhesive spray on your water-soluble stabilizer.
Let’s embroider a front side (Eyeglass Case Spider 0001 Top)
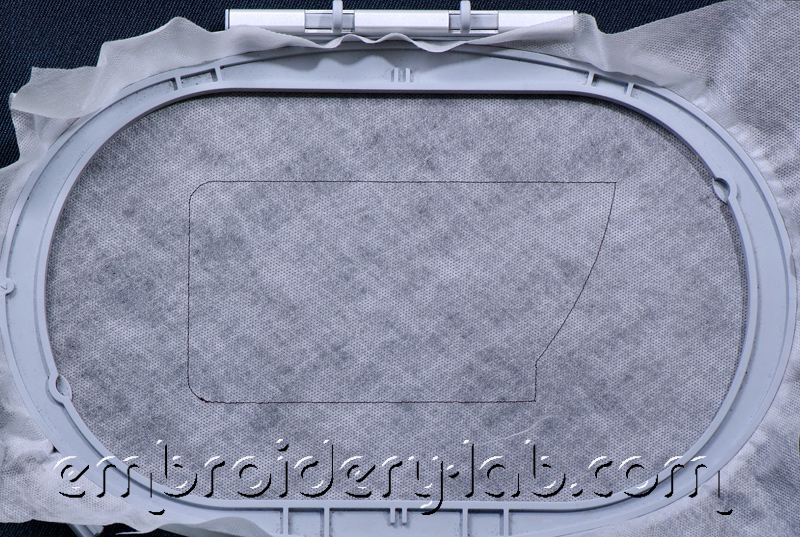
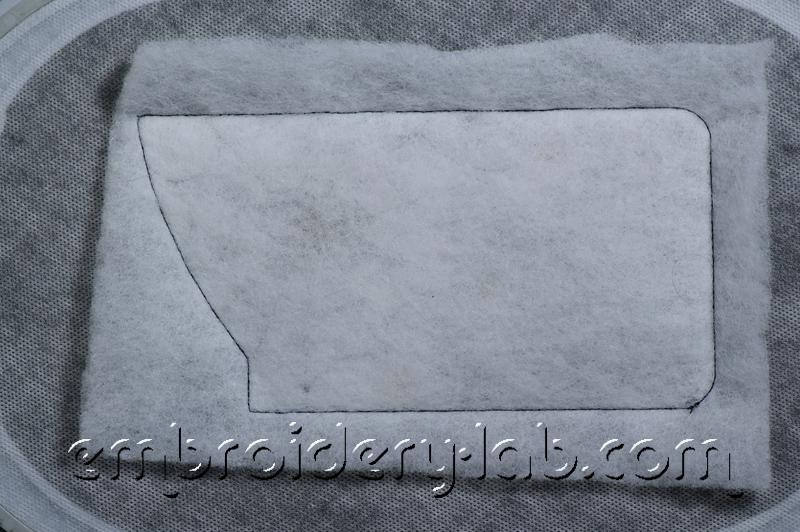
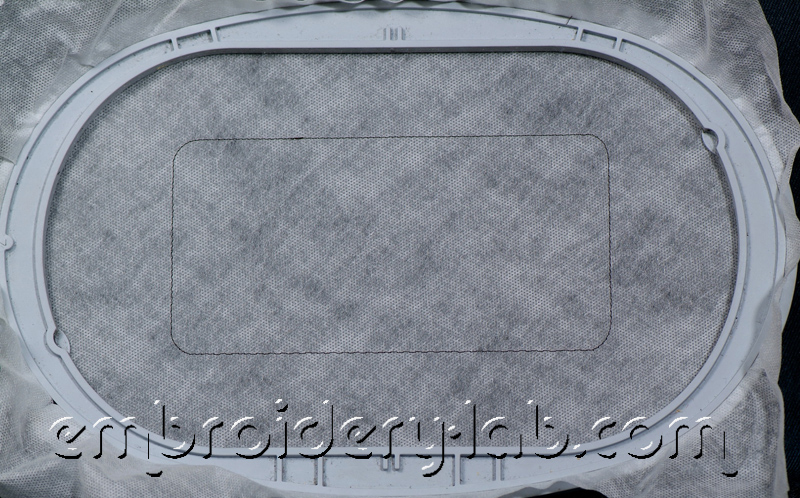
1. Hoop the water-soluble stabilizer and embroider the guideline using running stitches – it’s colour number 1 (photo 2).
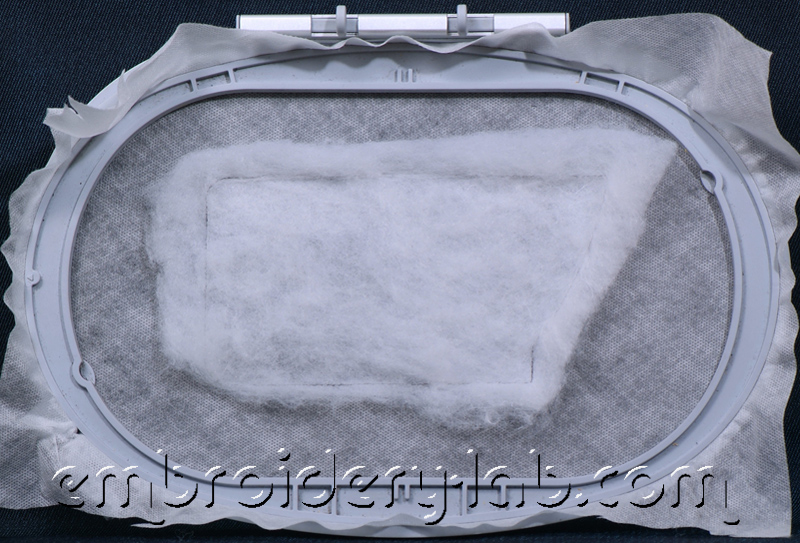
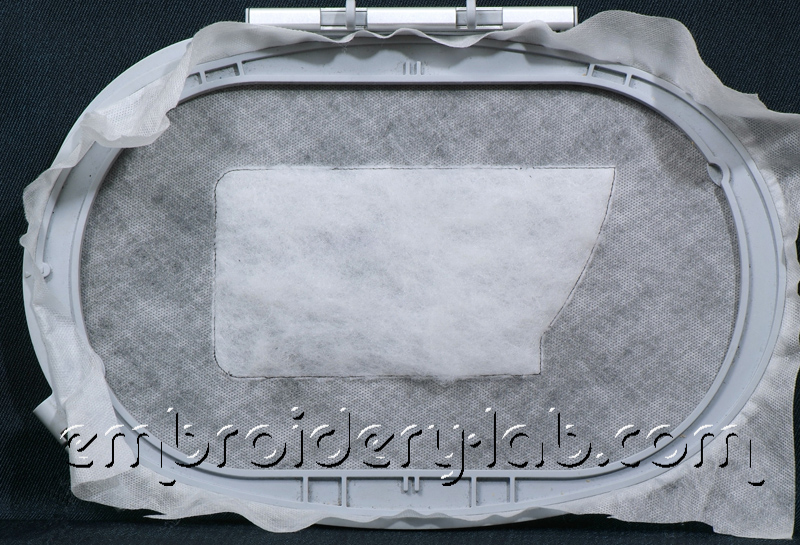
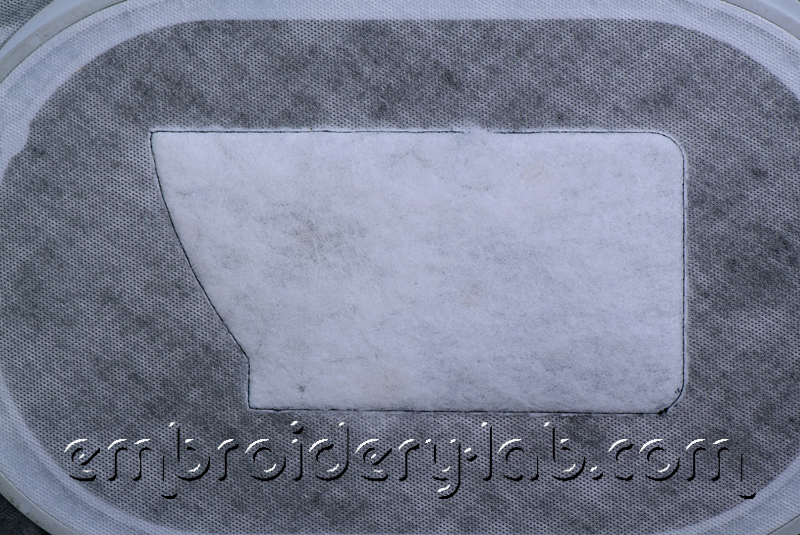
2. Place a padding polyester over the stabilizer and sew it – it’s colour number 2 (photo 3). You can spray a shot of adhesive if you want. Cut the padding polyester close to the line. CAREFUL: do not damage the stabilizer (photo 4).
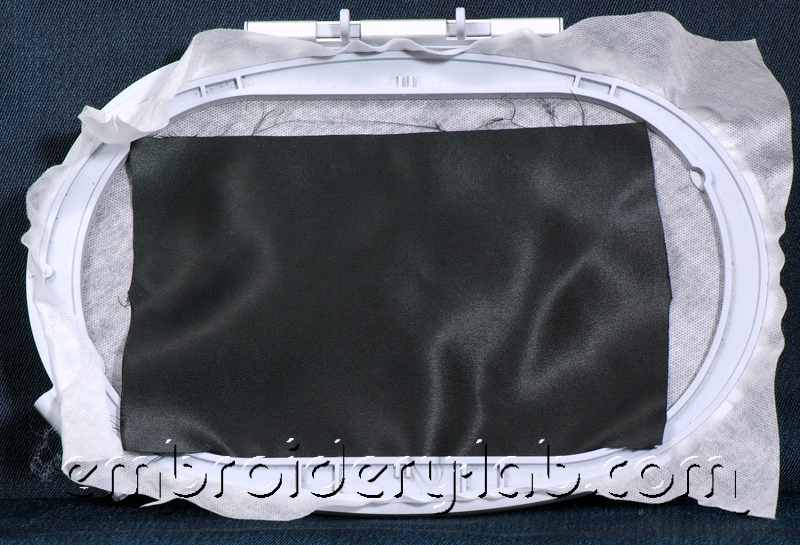
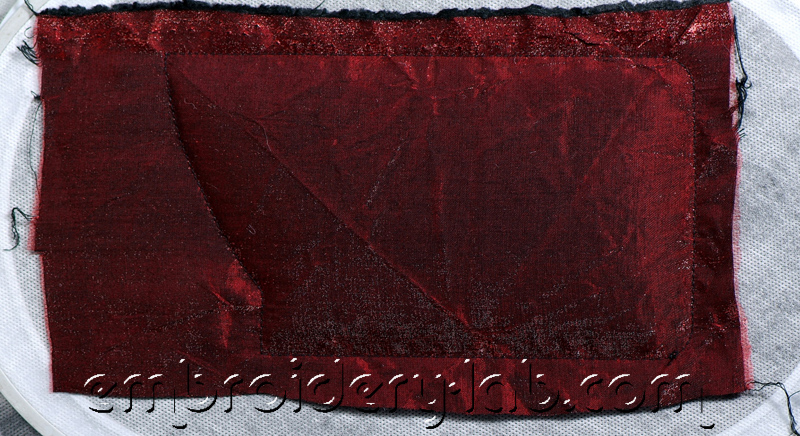
3. Place the fabric over padding polyester. The fabric should be bigger than embroidery’s guideline. You don’t need to fix it at the edges (photo 5).
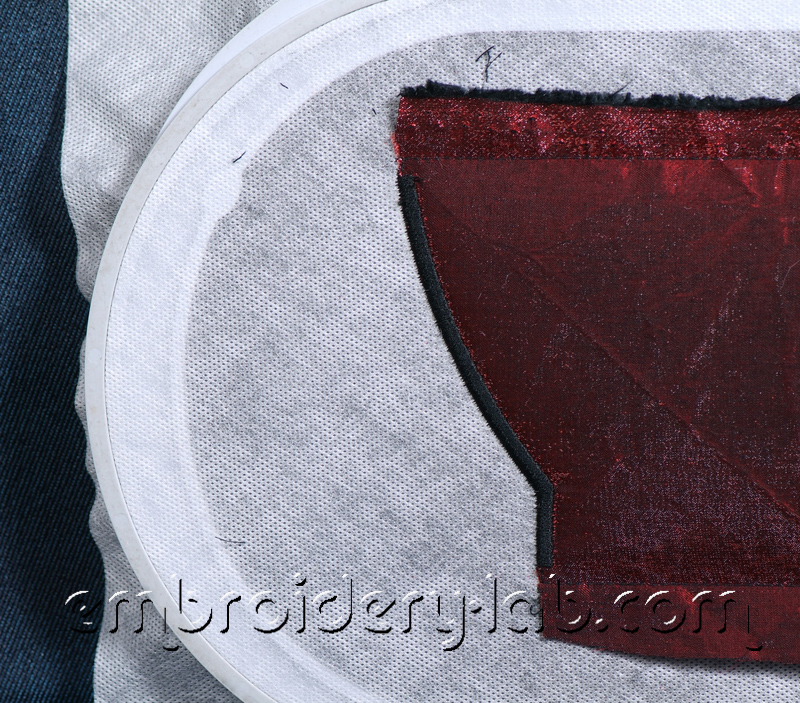
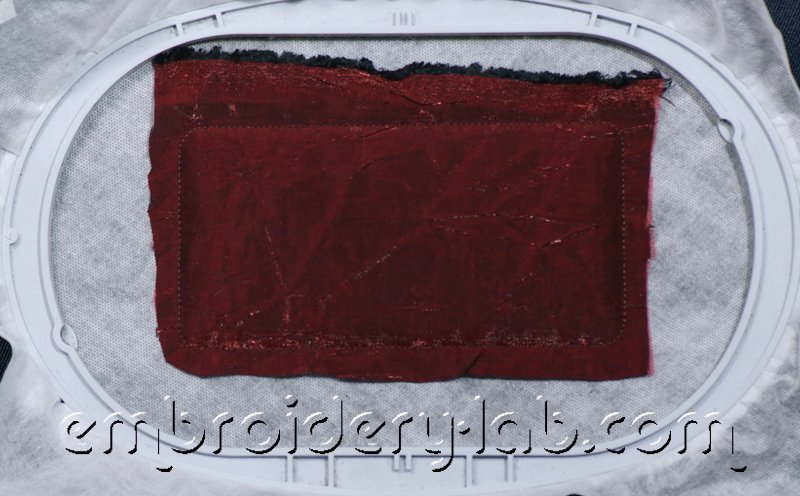
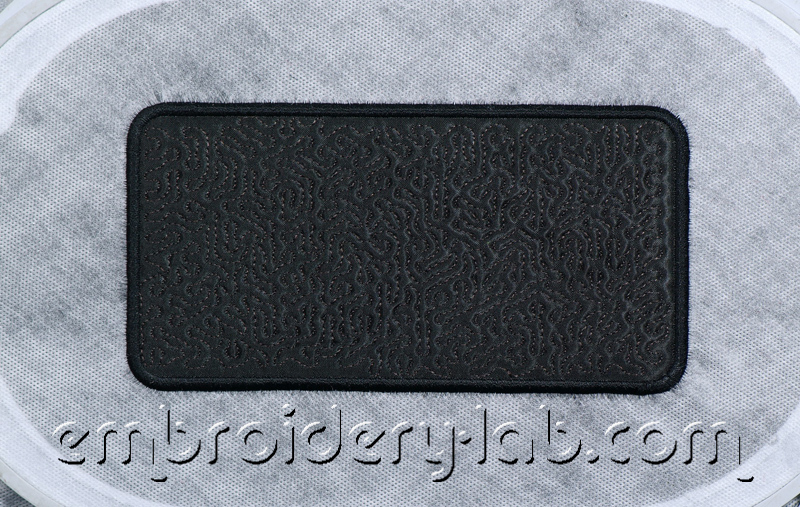
4. When embroidering, try to smooth the fabric as much as possible to avoid folds. Embroider the design – colours number 3 and 4 (photo 6, 7).


5. Fix the padding polyester on the back side of hooped stabilizer. It’s always handy to use Temporary adhesive spray, but if you don’t have it, you can simply fix the padding polyester with pins (be careful when you embroider!). Sew out padding polyester – colour number 5 (photo 8) and cut it close to the line (photo 9). This line is also a matching line that matches front and back parts of your spectacle-case, so it’s a good practice to use the thread that matched the color of the fabric.
6. When the padding polyester is cut close to the line, put over a piece of fabric for the inside. Fix it, as we did before fixing the padding polyester (photo 10). Sew it out – colour number 6 (photo 11).

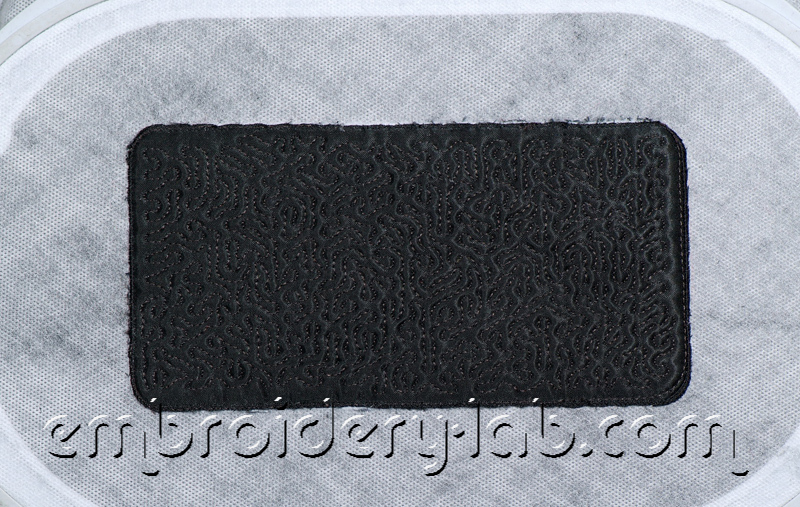
7. Embroider zigzag stitches along the top edge- colour number 7 (photo 12). Cut the fabric close to the zigzag stitch on both sides of the hoop (CAREFUL: do not damage stabilizer!). Don’t cut the side and the bottom parts!


8. Satin stitch along the top edge – it’s colour number 8 (photo 15 and 16). We are winding bobbins with the same color as the top thread.

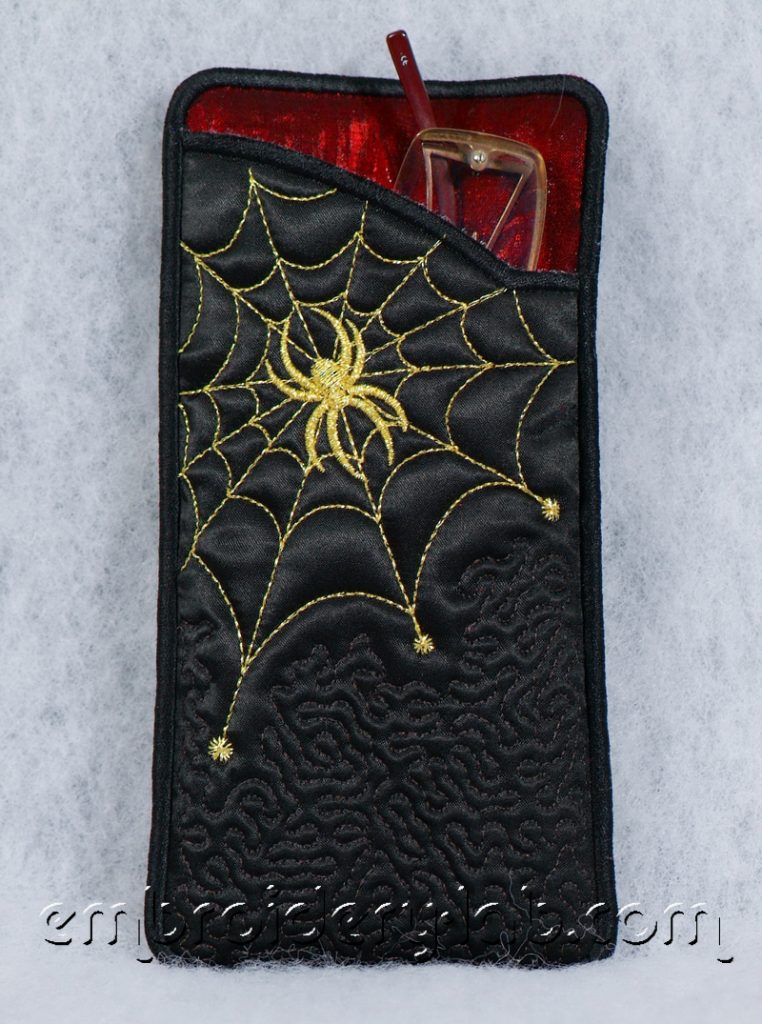
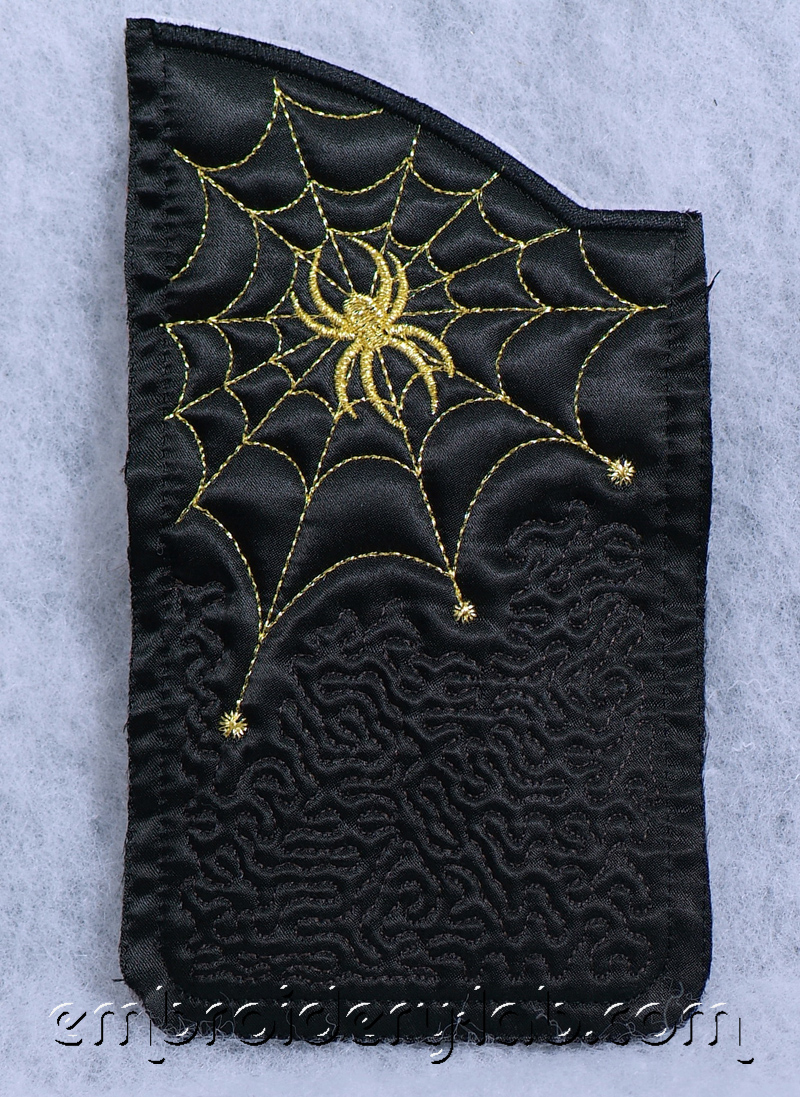
9. Cut the fabric and the stabilizer on the outer line (photo 17). The front side is ready!

- Let’s embroider the back side (Eyeglass Case Spider 0001 Back part 1).
1. Hoop either thick tear-away stabilizer or water-soluble stabilizer. Embroider the guideline using running stitches– it’s colour number 1. Stitch the padding polyester – it’s colour number 2 – cut close to the line (photo 18).

2. Put the main fabric over the padding polyester and embroider it – it’s colour number 3. Stitch alignment line – colour number 4, then stitch seam allowance lines – it’s colour number 5 (photo 19).

3. Cut out the embroidered part (photo 20).

-
Assembly (Eyeglass Case Spider 0001 Back part 2).
1. Hoop the water-soluble stabilizer and embroider the guideline using running stitches– it’s colour number 1 (photo 21).
2. Stitch the padding polyester – it’s colour number 2 – cut close to the line (photo 22).

3. Put the piece of fabric for the inside over the padding polyester and stitch it – it’s colour number 3 (photo 23).
4. Fix the back side of your spectacle-case onto the backside of the hooped stabilizer using adhesive spray inside of the sewn dieline (photo 24).

5. Spray a shot of adhesive than fix the top side of eyeglass case on the top side of the hoop (make sure there is no sticky trace). You can carefully pin all the parts. Zigzag all the parts – it’s colour number 4 (photo 25).

6. Cut the embroidered part on the both sides as close to the line as possible (photo 26, 27).
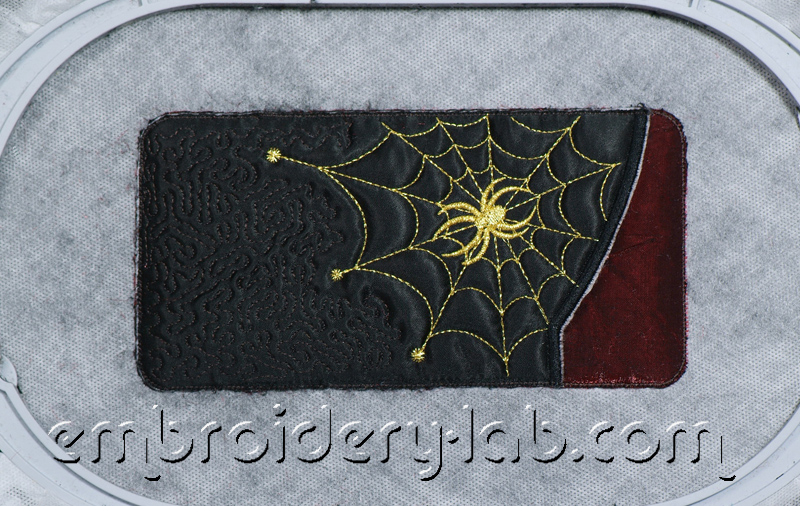
7. Satin stitch the eyeglass case – it’s colour number (photo 28, 29). *My machine sewed much better when I loosened the upper thread tension slightly.* Use the upper thread that matches the color of the bobbin thread.

8. Cut away the excess stabilizer (photo 30). CAREFUL: do not damage the eyeglass case!

9. Remove remained stabilizer using a wet towel (photo 31).
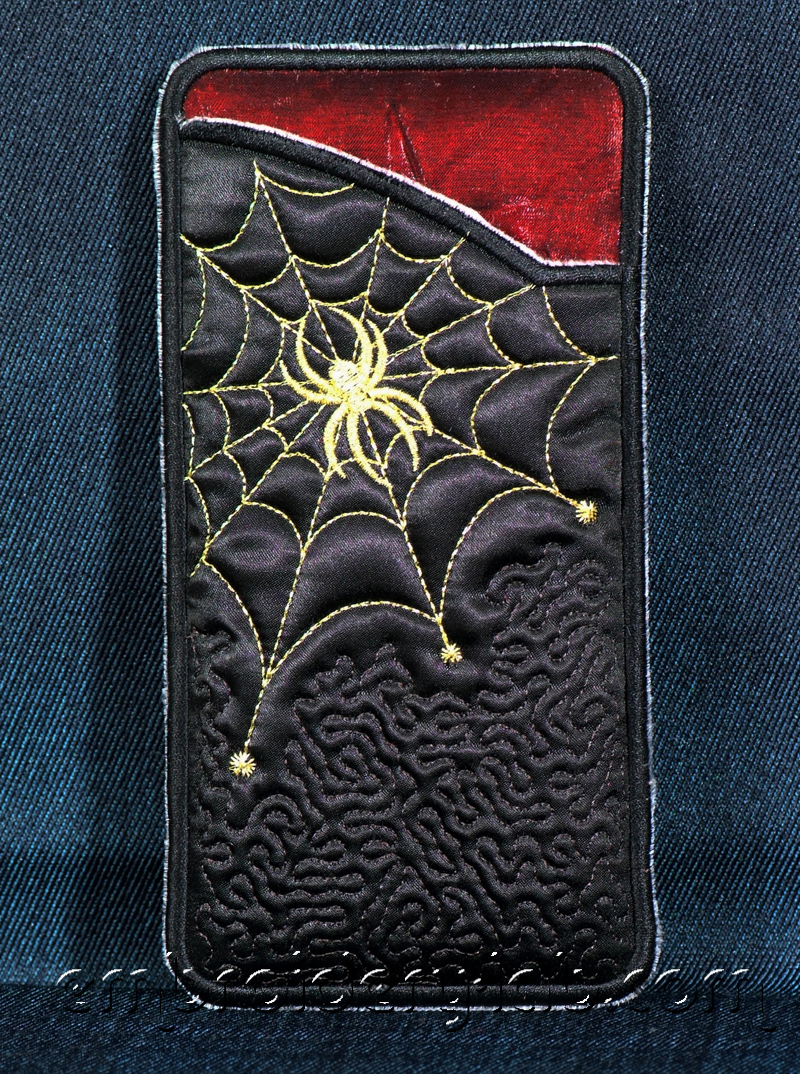
Awesome! Your eyeglass case is ready!